Showing posts with label technical stuff. Show all posts

Friday, October 31, 2014

Choosing a bicycle for transportation - Part 2: The important bicycle accessories and features


As you might already understood from the previous post, this is not the typical guide for choosing a bicycle for transportation.
I won't tell you what to buy and not! I will just puzzle you and make you think, so you can make that choice!
In the previous post, we talked about the different aspects that you have to consider in order to plan your route and imagine what your life as a cyclist will be. The purpose of the previous post was to prepare you, so you will know what to expect and I believe that you already acknowledge by now your particular needs.
In today's post we will talk about the important accessories a bicycle needs to have in order for you to use it for transportation. Today we will not talk about types of bicycles. The reason I'm not doing that is because I don't want to distract you. 
The accessories and features that we will cover today can be part of and work on any bicycle, no matter the type.
You will probably laugh, as many of these are common sense, but they are not common sense at all for someone who is just starting out. So let's begin!

The important bicycle accessories and features

The bell


The first item I will refer to is the simple and humble bicycle bell. This particular accessory might seem so small and unimportant. Oh, but how wrong you are! This little piece of machinery is a miracle. It is what is letting you communicate with the others.
Are there people walking in the middle of the road while playing with their smartphones? A simple "cling-cling" will immediately scatter the crowd. (Do not forget to slow down though! We must always be polite to pedestrians!)
Is there a car coming on the next intersection deciding whether to pass or not (you have priority), the simple "cling-cling" again will make the driver think that you acknowledge his presence and you can signal accordingly. (You can let him pass if you are feeling to, or not! You show that with your hand.)
You are riding a bicycle on the bicycle path while watching your clock, as you're late, but oh no there are these slow cyclists in front of you chatting and laughing and cutting you off, You desperately want them to make room for you to pass. What to do? Yell? Of course not! The bell is the polite way to go. The simple "cling-cling" on more time will inform the slow cyclists that you are there, and they will make room for you to pass, that's for sure!
In all those cases, the bell is the one that is letting you to communicate with the others! 

Bicycle fenders


The bicycle fenders, or mudguards, or whatever you like to call them, are a very important bicycle accessory as well. I have already wrote a post referring to them in the past, and despite the fact that I wrote that in summer and I was referring to a slightly different matter too (the one involving fenders' weight and why I never take them off my bicycle), the conclusion is the same.
No one likes to ride a bicycle with dirty water and grime splashing all over his back, feet and face. In order to avoid that you have to install a good pair of bicycle fenders. However you must keep in mind that the fenders must extend all the way to the back and cover the wheel completely. If not, the coverage will not be the optimum and ultimately you will find yourself having a dirty mud line starting from the nape of your neck all the way to your buttocks, even if you are using fenders on your bicycle. (This one mostly applies to the clip-on fenders mountain bikes have. Make sure that the fenders' length is enough for good coverage of the wheel.)

A comfortable saddle 


This is where you spend the whole time when you are on your bicycle, so choosing the right bicycle saddle is important. However you must take into account the aspects I was talking you about in the previous post for choosing the right saddle for you. The material, cushion, size, length or shape of your bicycle saddle will be depend on these aspects (weather, terrain, length of the route). Another tip? With bicycle saddles the rule "the more you pay, the better will be" does not apply. Its mostly a trial and error method. However before deciding, give your potential saddle (or saddles) a chance. For more information on this matter, feel free to read this post. You will understand better what I mean when I'm talking about taking into account the different aspects. 


Chain guard


This is another accessory of a great importance. I know I say that for all, but don't you want a nice cycling experience when you transport by bike? 
The chain guard will protect your clothes from getting in contact with your chain and will keep your pants and shoes clean. It also protects you from the splashing oils and dirt produced by your chain when it is raining. Think that the chain guard works like a mini fender for your chain! 
Chain guards come in all shapes and sizes. Some provide good coverage, others don't. The main purpose which is keeping your pants off the chain is succeeded with every shape and size. However the more coverage the chain guard has, the more protected you will be! If you choose a bicycle with internal gears, instead of derailleur gears, then you can also use a full enclosed chain case.

Gears


Chances are you will not ride on flat city. And even if you are, your home might be on the top of the one and only hill the whole area has (thanks to Murphy's law), so having gears on your bicycle is a good advice. 
You don't need a lot of gears, "the more the merrier" isn't applying here. For internal gears, 3 or 5 are plenty enough for transportation and for derailleur gears, 6 or 7 are more than enough! Unless you live on Norway or areas like that (they have some very steep hills there!) If so, feel free to choose a bicycle with more gears. However, a beginner always has the fear of restriction which pushes him to choose a bicycle with a number of gears that he never uses. And before you think "so what?", let me inform you that the more gears your bicycle has, the more complicated the maintenance will be. That is why I advise you not to buy a bicycle with more gears than you actually need. 

Lights


Last but not least, your future bicycle will need some lights. Again, you should invest in a good lighting system. You need a good front light and a rear light! 


Tip: The small blinking ones don't count as bicycle lights! The purpose of these little lights is for additional protection. Not for using as main lights.
Do not forget to take into account the aspects again! For more information on that matter, feel free to read this post, where I talk about the seriousness of having a proper lighting system on your bicycle but while I'm using a humorous tone.

Bicycle lock


Although a bicycle lock isn't exactly a part of the bicycle itself, it is a useful accessory! If you want to find your bicycle where you left it in the first place, you need to buy a good and sturdy lock! Again, take into account the aspects! If you live in a small village where everyone knows everyone and there aren't any foreigners, your lock doesn't need to be fancy or anything. But if you live in the city or in a place with lots of tourists then you need to invest good money on a proper lock.

So these were the most important bicycle accessories and features your future bicycle will need to have, in order for you to use it for transportation.

The latter features do not limit you, and also can be part of any bicycle, no matter its type!

(P.S. Sorry for the blurry images, it was dark and my camera did not cooperate.)

Tuesday, September 23, 2014

Taking care of a bicycle


A bicycle is a machine. Every machine needs some proper maintenance to keep running smoothly. Taking care of a bicycle isn't a hard thing to do, but it is a very important one. No one wants to ride a bicycle that feels like a slug or squeaks!
Just keep in mind to do yourself a couple of things on your bicycle regularly and your bicycle will feel smooth like butter when riding.


First of all, maintain a proper tire pressure. A bicycle that has a lower pressure on its tires feels like a drag. If you feel that your bicycle is slow and not so comfortable when rolling anymore, chances are you may need to pump up those tires! Invest in a good floor-pump and check your bicycle tires every week or so (depending on the use) for the right pressure. Do not make the mistake though and assume that your bicycle tires are inflated properly because you pumped them in the past and then left the bicycle unused. Bicycle tires loose air even when the bicycle isn't being used! 
Maintaining a proper tire pressure is important, not only because it affects the riding quality, but because tires that aren't inflated suitably are more prone to punctures.


Another thing that you must do for your bicycle is to lubricate the chain. When doing this regularly, the chain not only will run smoothly through the cogs but will also be not so apt to rust. You have to be careful though, do not put so much oil on the chain, as oil attracts dirt and grime. You do not want your bicycle chain to have a messy black and thick coating, as this will have the opposite effect. A light coating is all you need. I do this once per month on dry months, and every two weeks on wet months. My bicycle chain is still rust free and as good as new, despite the fact I live in a coastal area, where is humid, and that my house, where I park my bicycle, is only 40 meters away from the sea. (Your lubing times may vary, it depends on where you live and the conditions you ride, the wetter the ride, the more often you need to lubricate your chain.)


An additional thing to do is to inspect for scratches on your bicycle. At first, when I saw a scratch I felt my heart sink, but with time I got over it. Bicycles are getting scratched all the time! There is nothing we can do. What we can do is to find the scratches and coat them with clear nail polish (my little secret). The nail polish prevents the bare metal from forming rust (it works like a barrier, it doesn't let the metal to come in contact with the oxygen in the air, thus the metal does not oxidize) and it is also durable. Just keep in mind to clean (and then let dry well) the surface of the scratch before applying the nail polish. 


Last but not least don't forget to clean your bicycle. I usually just wipe the whole bicycle with a wet paper towel every now and then and wipe the cogs of the derailleur with a dry paper towel. When the bicycle is really dirty I might give it a proper wash, but that is something I've done only twice in the one and a half year that I own this bicycle. If you are properly lubricating your bicycle chain, then it doesn't need to be cleaned that often either. Mine is relatively free of grime. 

And that was all! These were the four most important things you need to do when taking care of a bicycle. I'm not saying that this is all the maintenance a bicycle needs, but these are the things that every bicycle user must take into account for a properly working bike!
There are of course other things (like adjusting your brakes, etc.) but these were the most simple and common "Have To's" associating with a bike.

And remember that when you're taking care of a bicycle, not only it will last longer, but it will have a better riding quality, too!

Wednesday, September 3, 2014

Waterproofing my lights


When I installed my new light set in February, I had to proceed to a custom solution as the front light was for a hub dynamo but I had a bottle dynamo on my bicycle. 
There wasn't a problem with the light itself but with the cables. A light intended for a hub dynamo has a really short cable, as the hub is only a few centimeters further down, and I had to find a way to connect the cables that run from the bottle dynamo and through the frame to the front light.
The custom solution that I followed was to cut a little bit the cable that came out of the front light and shorten it, so it wouldn't hang weirdly, and use some special clips for the cables to fasten the two different cables together. And I did this procedure two times, as I had to fasten together the grounding cables, too. 
This solution was effective and my lights worked alright. 
But after two months of cycling, one day that it rained really hard, my front light just didn't light up. At first I thought that the bottle dynamo was slipping, but that was not the case as the rear light was working. I then came to conclusion that maybe the system with the clips and the cables might got loose. I tried to adjust it but it was okay. 
I finally thought that maybe there was water into the clip and that is why the front light didn't work so I decided to give it a couple of days so that the water could evaporate.
I knew that the water was the problem because the previous night the lights worked fine. 
After two days I tried again to use the lights but still the front light remained unlit. 
The next day I called a friend who knows about bicycles to look it up. He adjusted the cables again and then the light became lit!
What a joy! The front light working meant I didn't have to ride in absolute darkness as I had been doing for the last three days.
So imagine my frustration when at the same night, after I've finished my work and wanted to head home, the light didn't work again!
The next day I called him back. The light was properly working when he came and saw it. 
Then it hit me! 
This particular light has two leds and an auto mode, during day one led it is on, during night the other one. After that dreadful rain the night mode wasn't working anymore. I was so sad! I gave up and rode in darkness for the rest of the week. 
One night, with a feeling of sadness I looked down at my front light and decided to turn it on to see what might happen...
...And it was suddenly working again! I just couldn't believe what my eyes were seeing! 
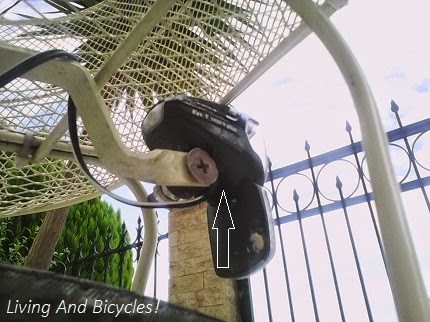
I then realised that my first impression was right. Indeed my lighting system had got water into it, although not the clips/cables, but the front light itself! The instructions said to avoid turning the bicycle upside down during washings as the bottom of the front light has holes and it might not work after being wet. I didn't wash my bicycle or anything, but as you can notice yourself from the pictures, my light is in front of the fender, not on top, and when it rains, water is splashing all over it! That was the problem!
(Fortunately the front light is still working perfectly until now.)
So that is why I've decided to waterproof my lights, as we are officially heading into the raining season. We already had our first big storm yesterday which reminded me that I need to do some waterproofing to my lights, so they won't have any problems in the future.
What did I do?


I used some electrical tape, which is supple and also more insulating, and covered the whole clip/cable system. I took my time doing it to ensure that every bit was properly covered and that water wouldn't be able to run through even during the heaviest downpour.


Furthermore, I used some electrical tape to secure the bottom part of my front light, too. I sealed the opening and double checked it to be sure that it is fully closed now and no water can come in through it. 

And that was it!
Who could ever told me that a piece of an electrical tape would ever give me such a joy! 
I feel happy as I believe that now my bicycle is ready to face even the most extreme rainfalls!

Are you prepared for the raining season?
Do you have any bits in your bicycle that might need some sealing or adjusting?

Wednesday, August 20, 2014

How to fix a flat tire


It happened again, yes!
I'm thinking that maybe it is due to the hot weather. 
Bicycle tires are more prone to punctures when the weather is either too hot, or too cold, or even too wet. 
In a period of two weeks I had to repair a flat tire twice. However the first time it was entirely my fault! 
While I was taking pictures for a previous post, I accidentally dragged my bicycle into some thorns. I didn't realise it until much later, after finishing the photoshoot and walking towards a bench, where I wanted to sit down and eat my delicious herb-pie made by a local bakery while admiring the sea view. When I noticed the round shaped thorns, I kneeled and started to pull them out one at a time. I was doing a great job, but when I pulled the fifth I immediately heard a "ffff" sound. That was the first puncture!
So I packed my things and rode back to the city center, as I didn't want to walk the whole way back. Then I locked up my bike and sat on a bench right opposite of my workplace to eat my pie, as I had another 30 minutes before showing up to work.


The next day I bought the tools for fixing up my flat tire myself, as I already knew how it was done when I watched the bicycle shop owner do it in the past. 
However, after about 4-5 days my bicycle tire got another puncture. Needless to say everyone thought I didn't do a proper job when I fixed the first puncture, so I was so delighted to reply to them that this time the other tire was flat and not the one I repaired!
The cause of the second puncture was found after investigating the tire from the inside and the outside repeatedly! It was a tiny piece of debris pinned on the tire from the outside and in normal conditions this piece would never lead to a puncture. That is why I blame the weather and the bad timing for getting a flat tire, as the hot temperature might  have"soften" the tire and a certain bang gave that result!. 

Now let's proceed to the actual tutorial of how to fix a flat tire.

The Steps


Step 1: Gather all the tools together. 
You will need a pump, sandpaper, the special sticker for repairing an inner tube, glue and 2 small spoons (if you don't want to buy the special calliper for the bicycle tire) and a container filled with water.


Step 2: Open the tube's valve and let the remaining air to escape. Then with the help of the two spoons pull the tire out of the rim.

Notice the stcker from the previous flat!

Step 3: Carefully with your fingers grab the inner tube and pull it out of the tire. After removing it from the tire, inflate it a little bit using the pump and then dip it into the water every bit at a time moving it clockwise until finding the hole.


Step 4: After finding the hole, with a pen draw a circle around it.


Step 5: Rub the hole using the sandpaper so it will have more grip for holding the sticker.


Step 6: Apply glue all over, not only on top of the hole, but in the round area that surrounds the hole too. Wait for 10-20 seconds (depending the glue) and then put the special sticker on top and press with your finger firmly. 


Step 7: After waiting for 5-10 minutes for the glue to harden completely, slowly start to push the inner tube back into the tire with your fingers. When the inner tube is in place, grab the tire with your fists and squeeze it back into the rim. Inflate the tire completely using the pump and now you are done with fixing your flat tire!

Tips: 
1) If you just want to replace the inner tube with a new one, skip steps 4,5 and 6.
2) Don't forget to open your brake before attempting to pull out the inner tube.
3) For step 7, it is easier to have the bicycle upside down.
4) After step 6 and while waiting, inspect the inner side of the tire along with the outside  and remove any bits that are pinned to your bicycle tire.

Hope I've helped! 
Now you know how to fix a flat tire, too!

Friday, August 15, 2014

How to open a V-brake


Today's post is dedicated to a technical matter that everyone who owns a bicycle is good to know and that is how to open a V-brake.
I advise you to learn how to do it, because in 70% of the technical cases that relate to a bicycle the first step is opening up the brakes. But the most common cases are when you must open your brake to take your bicycle wheel off or to fix a flat tire or when you just want to check if the brake pads caught any debris so you can clean them. 
I understand that probably the majority of you might already know how to open it, but as I didn't know it myself at first and someone else showed it to me, I thought that is would be nice to share it with you so you can learn, too. 

The Steps

It takes only about a couple of seconds to finish the whole process, so let's start!


Step 1: You must first slide over the little rubber tube that covers the cylinder which is circled in the photograph above.


Step 2: After baring the cylinder, you must press both sides of the brake towards the middle.


Step 3: While still holding the sides of the brake, you must then release the cylinder from its metal handle.


Step 4: After releasing the cylinder, now you can stop holding the sides of the brake and leave them to fall open at the sides of the tire as shown in the picture.

Your V- brake is now open!
For closing it, you just repeat the steps in reverse.
NoteDon't forget after closing the V-brake to slide the rubber tube back on to cover up the cylinder, because the cylinder must not get wet or it will rust.

Now you know how to open your V-brake, too!
Do you do your own maintenance to your bicycles?

Monday, July 14, 2014

Bicycle chain on the loose?

You feel the air hitting your face, your heart pounding like crazy with excitement, you continue to hold on tight to the handlebars while you watch the road unravelling in front of your eyes and you are thinking "I've got this!" as your bicycle is rolling down the hill. But before you can even blink a bump on the road appears and sends you flying for a couple of seconds in the air which just adds up to the excitement...!
...But then comes the landing, and as your bicycle hits the asphalt and you hear the sound, you immediately realise that your chain just slipped. But don't feel worried, this happens to all bicycle users! 


The one time that happened to me, it was when I was still a newbie and I was all alone heading to work, with absolutely no idea how to fix a slipping chain, especially one which also has a chain cover. So I just got frustrated and decided to walk my bicycle to the nearest open shop at that early time. For my good luck it was a hardware store and the owner was really polite and showed me a way to adjust my bicycle chain again that is easy and chain cover friendly. No need for a screwdriver also!


The steps


Step 1: You place the bicycle up against a wall or something as the kickstand usage will be an obstacle with this method.

Step 2: You just find something so you can protect your hand from getting dirty. I usually grab a piece of paper or a tree leaf as they're the most convenient for me. (In the pictures I wear gloves as I was home and I also had to first take the bicycle chain off on purpose which cannot be done without getting dirty).


Step 3: You just hold with your finger the chain on one of the chainring's teeth that is placed on the bottom part. 


Step 4: While still holding the chain on one of the chainring's teeth, you start to move the pedals backwards.


Step 5: Voila! Your chain is back on, I just roll the pedals backwards a couple of times again to just be sure.


Now you are free to continue the ride!
The next time that my chain slipped, I adjusted it myself in only 10 seconds! 

Let me know if that method worked for you!